




Your own crypto wallet: set up, top up and pay in the shop
With your own wallet you pay your invoice directly in Bitcoin or Litecoin — no fee, instant and no detour via vouchers. Setup takes about 15 minutes once. After that you pay with just a few taps. This guide walks you through it step by step: get a wallet → set it up → top it up with crypto → pay in the shop.
A quick word on ID checks
Creating a wallet needs no ID. When you buy crypto, the purchase provider in the EU now almost always requires a one-time, quick ID check (a legal requirement) — usually just 1–2 minutes, and done after that.
What is your „own" wallet?
A wallet is your digital purse for crypto — like an account that belongs only to you. „Own" (non-custodial) means: you hold the keys, not an exchange. You have full control over your funds. More about wallet types and security: Wallet know-how →
Which wallet? — 2 simple recommendations

Exodus — the all-rounder
for phone and PC- Holds Bitcoin (BTC), Litecoin (LTC), Ethereum (ETH), USDT and many more — covers all of our payment options.
- Runs on phone, PC and in the browser.
- Buy crypto right in the app — credit/debit card, Apple Pay, Google Pay, SEPA transfer, PayPal (depending on country and provider).
Ideal if you pay with Litecoin or another currency — or simply want one app for everything. Download Exodus · official guide

Relai — the easiest
Bitcoin only- Bitcoin (BTC) only — but as simple as it gets.
- Buying and your own wallet in one app — SEPA transfer, Instant SEPA, SOFORT, credit/debit card, Apple Pay, Google Pay, PayPal.
- Runs on your phone (iPhone & Android).
Ideal if you just want to pay your invoice in Bitcoin quickly and as simply as possible. Open Relai
In short: Paying in  Litecoin or another currency → Exodus. Just want to pay
  Bitcoin quickly → Relai. Both are secure and non-custodial.
Step 1 — Install & create your wallet
- Download the app only from the official source (website / App Store / Play Store) — beware of fakes.
- Open the app and choose „Create a new wallet".
- Set a PIN or enable Face ID / fingerprint.
The exact taps are shown in your wallet's official guide — always up to date: Exodus guide · Relai (guides you in the app).
Step 2 — Back up your recovery phrase (most important step)
When creating the wallet you are shown 12 words (the „recovery" or „seed" phrase). This is the master key to your funds.
- Write it down on paper, in exact order, and keep it safe.
- Never store it as a photo/screenshot/cloud/chat.
- Never share it — not even with us. VenneTV will never ask for your phrase.
Step 3 — Top up your wallet (buy crypto)
- In the wallet tap „Buy" and enter the euro amount you want.
- Choose a payment method — available options depend on the wallet:
- Exodus: credit/debit card, Apple Pay, Google Pay, SEPA transfer, PayPal (depending on country and provider).
- Relai: SEPA transfer, Instant SEPA, SOFORT, credit/debit card, Apple Pay, Google Pay, PayPal.
- Complete the one-time, quick ID check (see the note above).
- The crypto you bought lands directly in your own wallet.
Step 4 — Pay in the shop
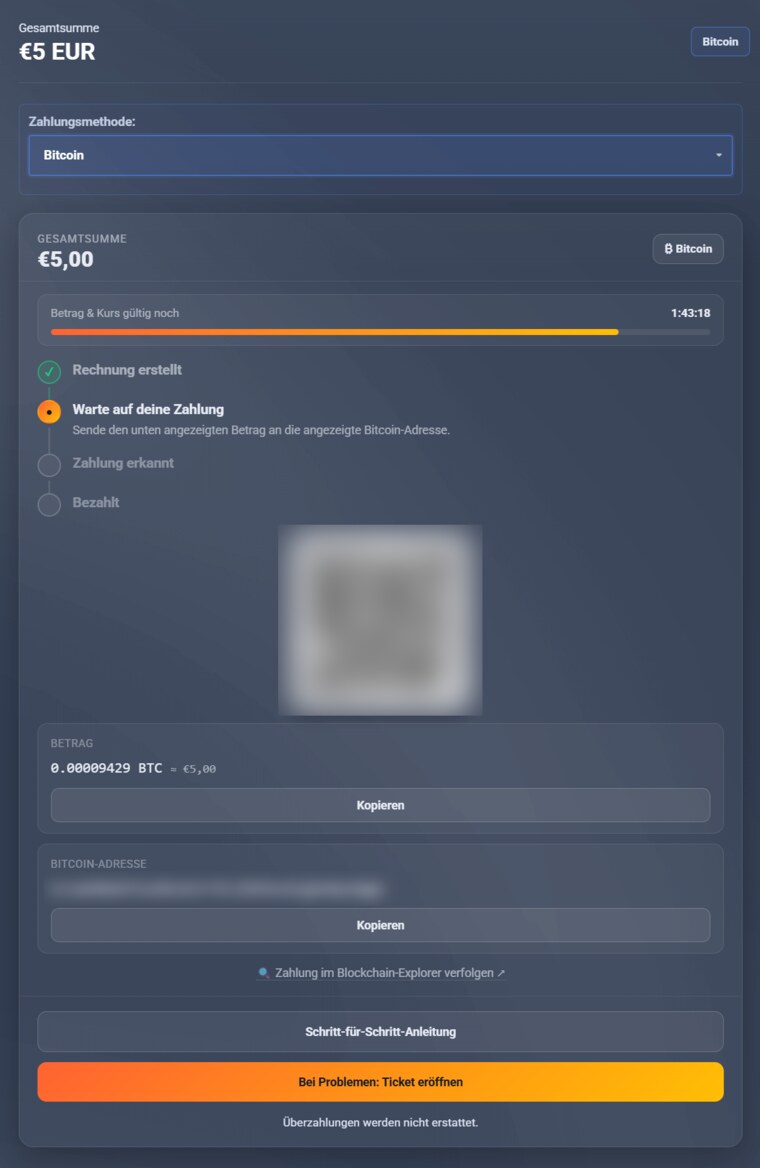
- Order your access and choose „Bitcoin" or „Litecoin" as the payment method in the cart.
- Your invoice page shows your personal address, a QR code and the exact amount.
- In your wallet tap „Send", scan the QR code (or copy the address) and send exactly the amount shown.
- Done — once the payment confirms, your access is activated automatically.
Detailed payment guide: Pay with Bitcoin or Litecoin from your own wallet → · Another currency (Ethereum, USDT …)? Pay with your own wallet · other coins →
Security at a glance
- Recovery phrase: never share it, never store it digitally.
- Always send the right currency: Bitcoin only to a Bitcoin address, Litecoin only to a Litecoin address.
- Check the address — best to scan the QR code; when copying, compare the first and last characters.
- Send the exact amount. Overpayments will not be credited or refunded.
- Every invoice has its own fresh address with a time window — always use the one currently shown.
- Only use the official app from an official source.